STM32 Health Monitoring Device
TLDR Summary
Programmed an STM32 IoT board to interface with various sensors, simulating functions of a smart watch for monitoring elderly’s health.
This was the final project for EE2028: Microcontroller Programming and Interfacing. This module covers the basic architecture of microcontrollers, as well as programming them with ARM Assembly (specifically the ARMv7-M instruction set) and C using the STM32CubeIDE.
For the final project, we were tasked to create a wearable device for monitoring elderly’s health using the B-L475E-IOT01A Discovery Kit. This involved interfacing with various onboard sensors to implement a list of features, like detecting falls or measuring body temperatures. We were also given the option to add more components e.g. OLED screen, buzzer, etc., and implement extra features as we saw fit.
Our submission fulfilled all the base requirements with many added enhancements, earning it one of the highest grades in the course and being featured in the inaugural NUS ECE Project Showcase 2025. As this was pair work, I will be largely focusing on my contributions to the project below.
Base Features
As part of the project’s base requirements, the following features were implemented. (Only covered in brief as these were mostly covered by my group mate)
- Fall detection: Used the accelerometer to detect free falls when acceleration across all 3 axes falls below a threshold.
- “Abnormal movement” detection: Used the gyroscope to detect rapid changes in orientation across all 3 axes.
- Improper posture detection: Used the magnetometer to detect when the device is lying on its side.
- Fever detection: Used the temperature sensor to detect when the temperature exceeds a threshold.
- Mode switching: Double clicking a button toggles between a standard mode that reports the raw readings collected and an “emergency” mode that shows the warnings instead.
Beyond the base features, some extra features were implemented.
- Converted the accelerometer free-fall detection to use interrupts, reducing CPU usage.
- Added step-counting functionality using the accelerometer.
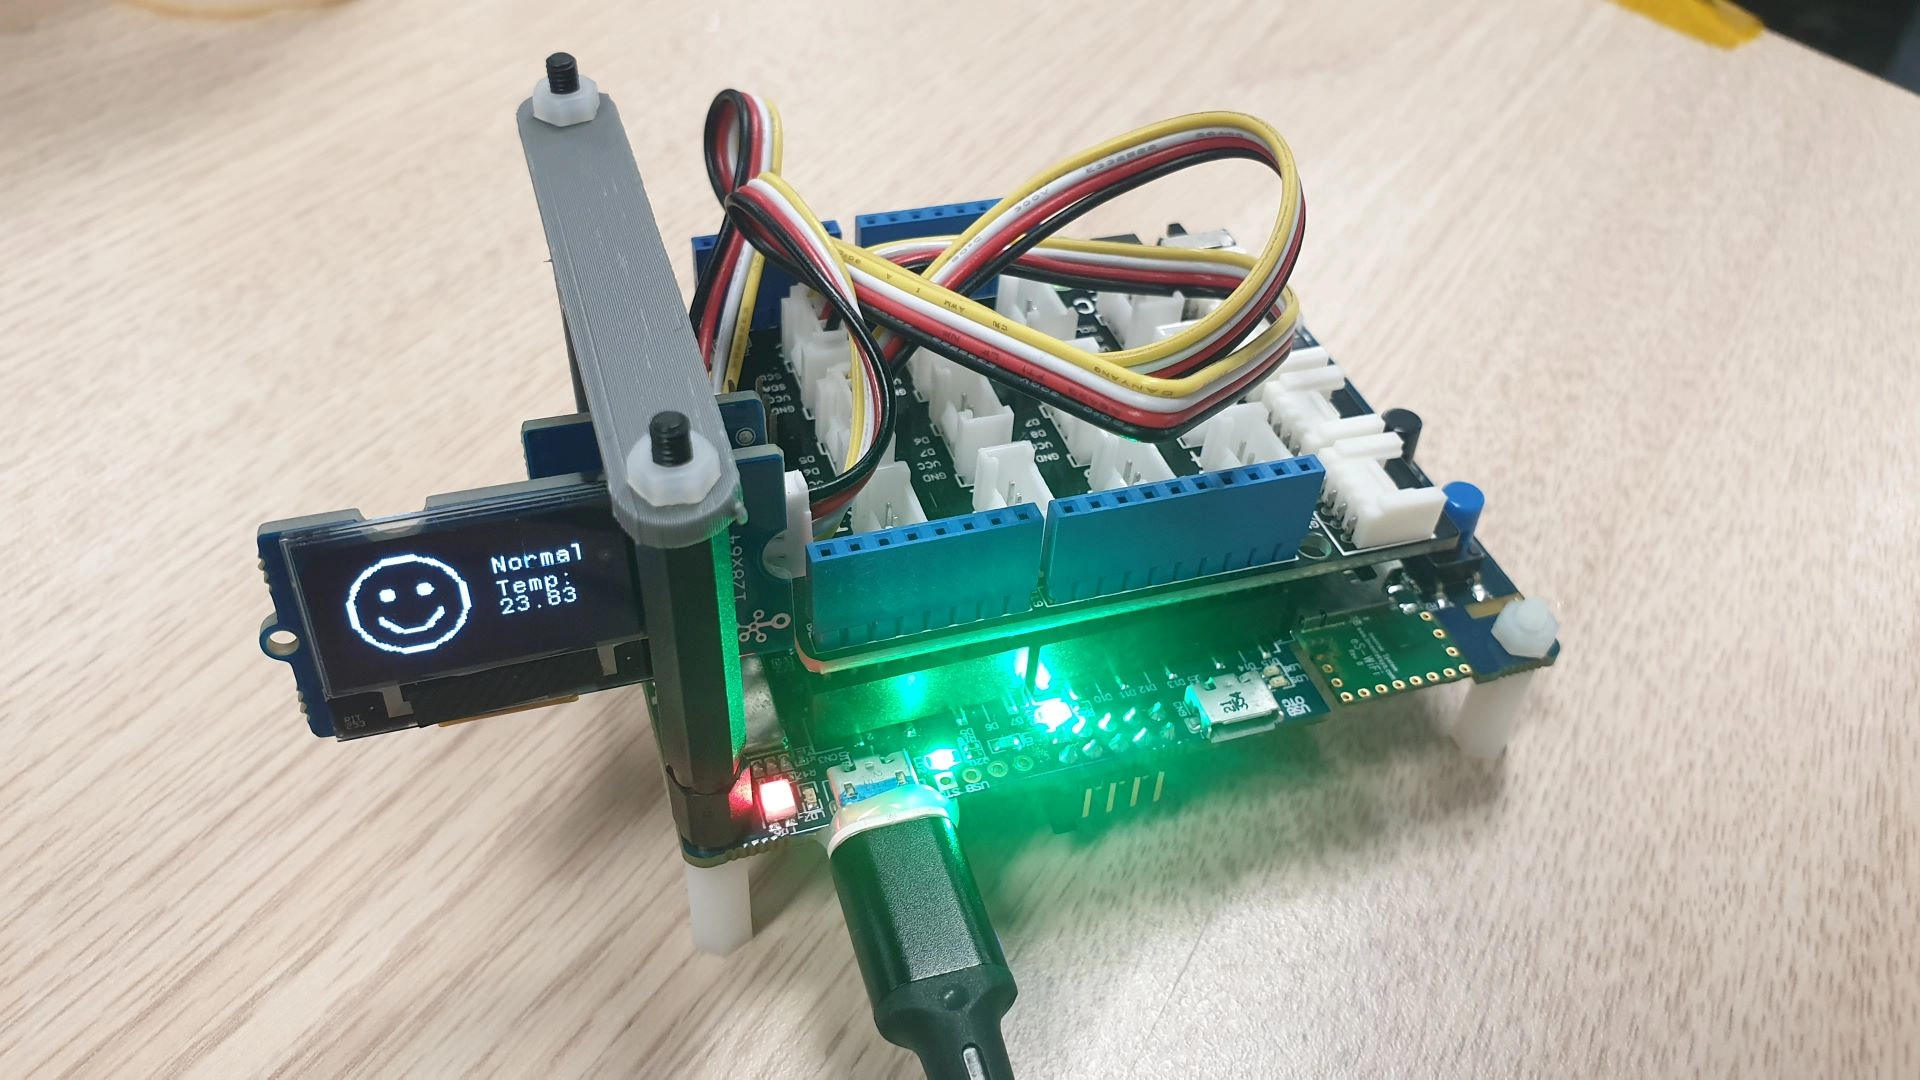
- Used an OLED screen to display the details that were sent over UART. Additional graphics were added for the emergency mode warnings too.
Orientation Visualiser
Inspired from a paper I had read in the past about estimating body poses from IMUs (IMUPoser), I reasoned that fusing the raw gyroscope, accelerometer and magnetometer readings to get accurate attitude estimates would be a useful feature.
Of course, with the limited time there would be no way to actually implement full body pose estimation. But for a simple demonstration, I wanted to use an Extended Kalman Filter (EKF) to perform the sensor fusion, followed by visualising the board’s orientation as a rotating 3D cube on the OLED screen.
Truly, an STM32Cube. (please clap)
Fixing Clock Issues
To get there, I had to first fix a problem with the OLED having slow refresh rates. When I first sent bitmaps to the OLED screen, the whole board felt extremely sluggish, hitting refresh rates of 1-2 FPS.
A quick calculation showed this should not happen. With a 128x64 pixel screen, a total of 8192 bits were sent per refresh (round up to 10000 bits to include overhead). With the I2C clock speed configured to 400 kHz, there should at least be a 400000 / 10000 = 40 Hz refresh rate.
Another oddity came from testing the buzzer, where I had to set extremely high frequencies beyond the human audible range in order to produce even a low-pitched tone.
Observing these 2 bugs, I suspected that the clock speed was not being set correctly. With some debugging, I found that the system clock was indeed set to 4000000 (i.e. 4 MHz), as shown in the screenshot below. This was much lower than the 80 MHz I was assuming the board was operating at this whole time!
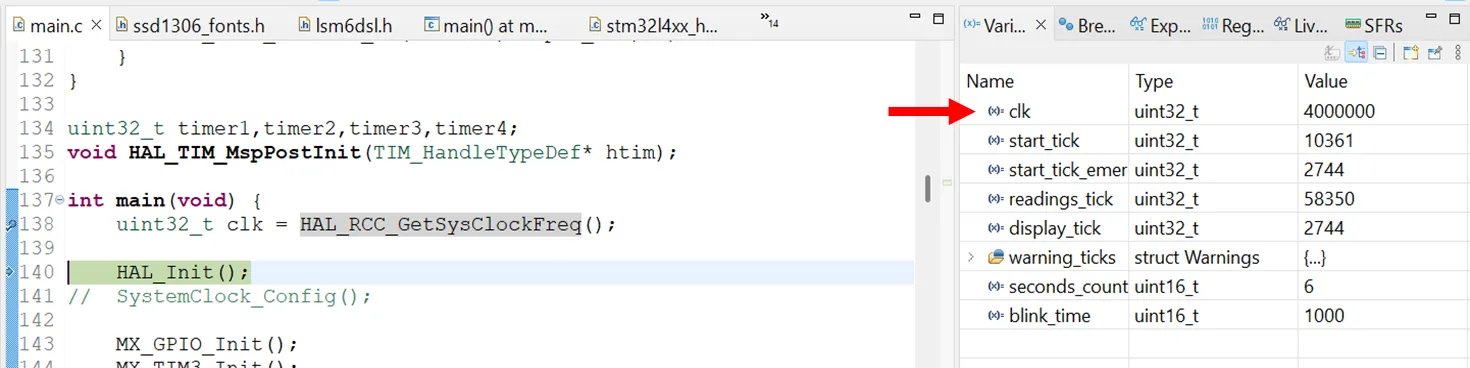
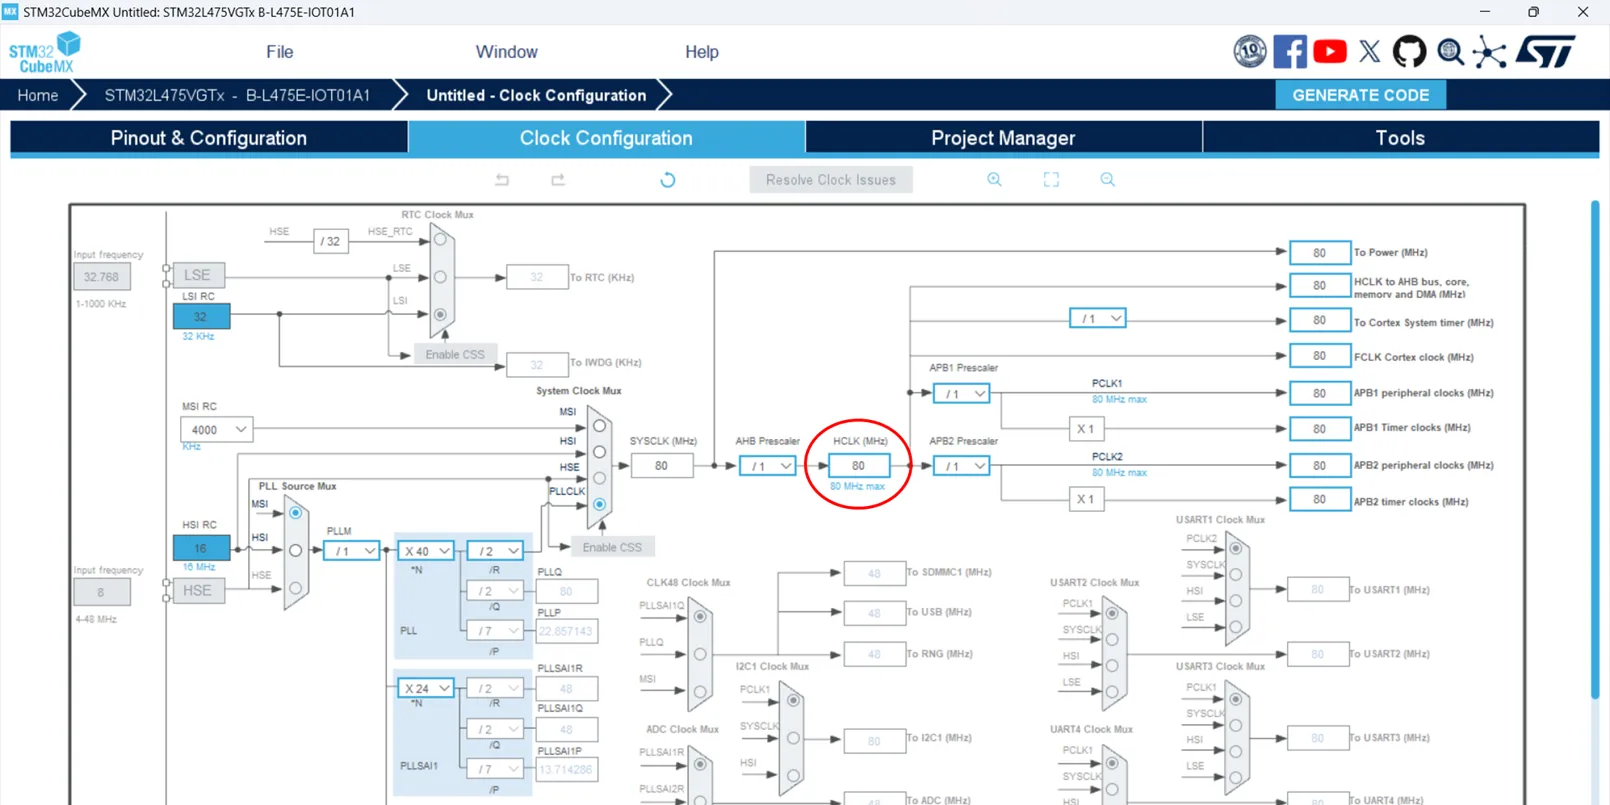
Turns out the boilerplate code provided by the teaching team did not include any clock setup code! With the problem found, a quick reconfiguration within STM32CubeMX fixed the issue.
EKF + Cube Visualisation
Not going into detail here because the resources below already explain everything way better than I can.
By referencing the following resources:
- EKF implementation for 3D orientation [link]
- Very well explained stack exchange post about projecting 3D points onto a 2D plane [link]
- Video displaying a fixed cube orientating in one axis [link]
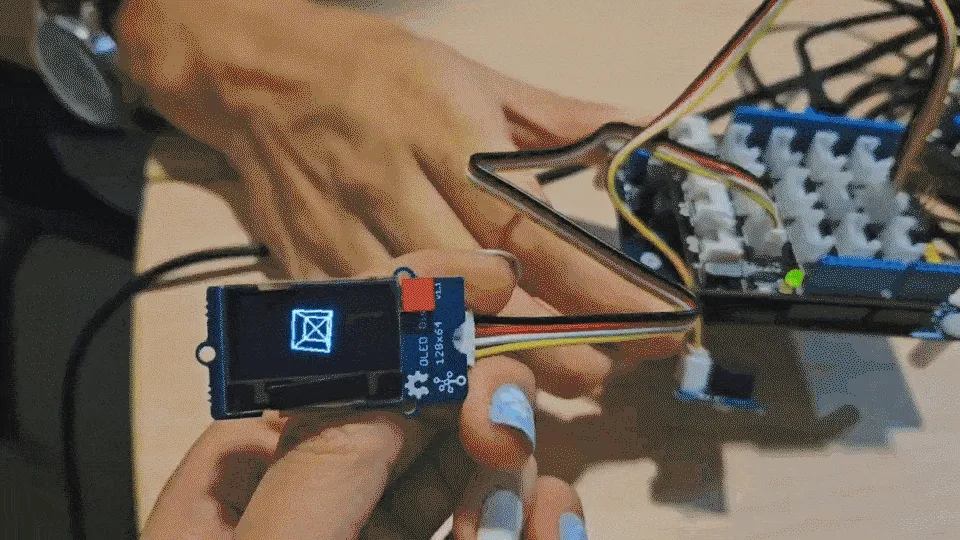
I was able to get the following visualisation that matched the board’s rotations:
Wi-Fi Communication and Dashboard
Another key enhancement was the addition of Wi-Fi communication, which used the IoT board’s Iventek Systems Wi-Fi module to allow the device to send data wirelessly to my laptop. The conceptual reason behind this feature is so that multiple devices could connect to a central “server” for monitoring of any anomalies.
A simple dashboard application was created using PyQt for the data visualisation. Data from the connected device(s) were listened to using the sockets library and the data stream was fed into the various real-time graphs being plotted. To showcase bi-directional communication, a text box was also added at the top, allowing the user to send a number to change the mode that the program was operating in.

Other Features
There were other smaller features implemented, which I shall list below:
- Buzzer which beeped when anomalies were detected in emergency mode. This was done by generating a 50% duty cycle PWM signal with one of the hardware timers at a specified frequency.
- Receive messages via UART using interrupts, which could change the program to run in different modes.
Conclusion
I took this course ahead of schedule (Y1S2 instead of the typical Y2S1) both to clear pre-requisites for subsequent courses, but also to preserve my sanity. In stark contrast to the other first-year/common courses, this was the first time in my university journey where the holy trinity was finally achieved: the course was interesting, useful, and I actually learnt new things; i.e. the first non-fluff course. Funny how this still happens at the college level…
University gripes aside, this course really provided a good mix of both theory and hands-on lab/projects. Overall, it served as a great introduction to Assembly (not covered in this project write-up), as well as a much-needed refresher on ARM MCUs considering the last time I touched them was in 2021…
← Back to projects